


**********************************************************
***************************🌷🐰👉🏼Jump to Recipe👈🏼🐰🌷********************************************************************************
Eastertime or Anytime!
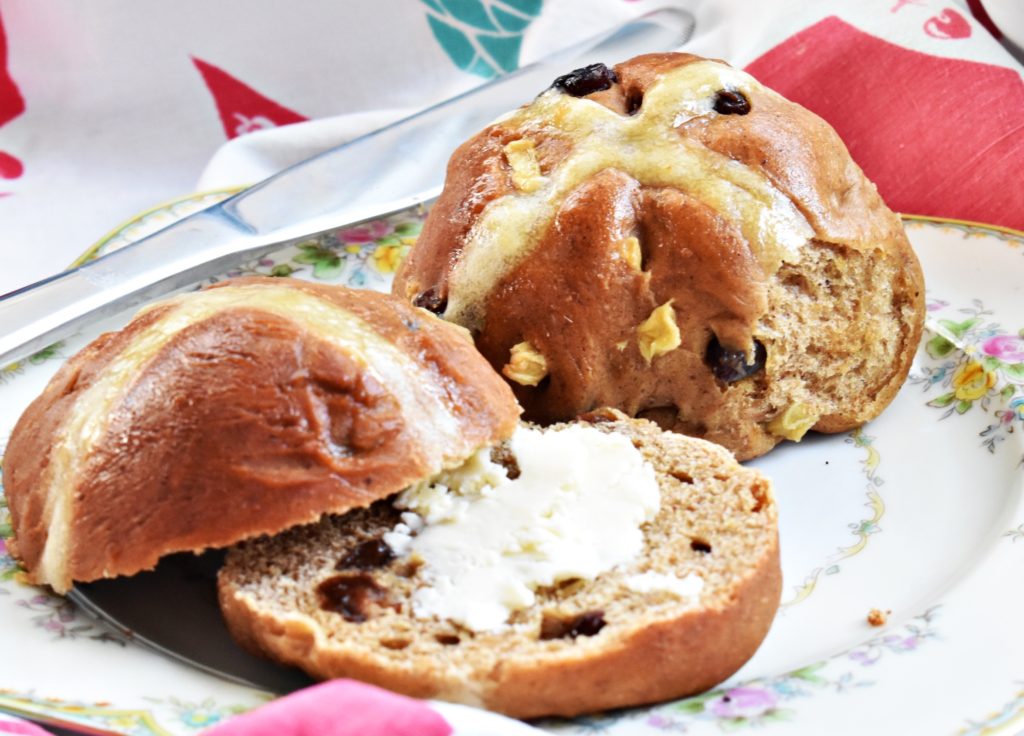
Easter breakfast is made with these delicious vegan hot cross buns. Yes, they do take a while to prepare and I definitely suggest making them a day ahead of time. They are NOT difficult, but do require three separate proofing or resting times and some elbow grease…a bit of a labor of 💖. It’s worth it! I think you’ll really like these and if you’re like me, will want to make them often. (they freeze beautifully, too!)

The Vegan Recipe Origin
My recipe is a compilation of the work that is already out there; I simply added my own vegan tweaks and adjustments. If you’ve read my blog, you know I have a bit of an obsession with the Great British Baking Show and so have come to appreciate the recipes of Mary Berry and Paul Hollywood. If you don’t already own this, I recommend Mary Berry’s Baking Bible.


No, her recipes are not vegan, but Ms. Berry’s techniques are so valuable and you can adapt many of the recipes to make them plant-based. Subs don’t always work perfectly, however. My recipe here was the result of trial and error. It is as close to perfect as I think I could get. I used white bread flour because other flourless and gluten-free versions I attempted were pretty awful. Happily, I was able to remove all dairy and refined sugar and oil… I SWEAR you won’t know the difference! P.S. you can use cane sugar, vegan butter and any whole fat plant milk rather than the “healthier” ingredients I’ve chosen. Still vegan, people!
The Process
The recipe below outlines the key steps you will need to follow. I’ll highlight parts of the process that you might find a little tricker.
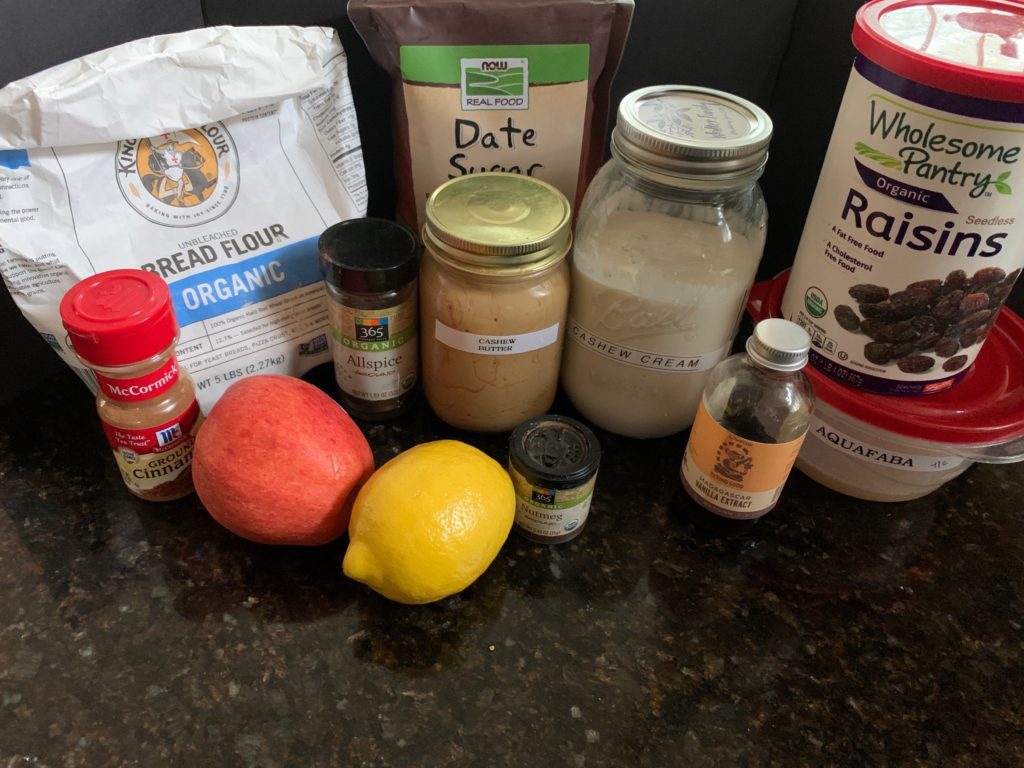
Gather your ingredients. Seems obvious, but it’s lousy when you start making something and realize you’re missing one or two items. (especially now in April 2020 when a trip to the grocery store is a process outlined by the CDC and one not to be taken lightly)

Measure with a scale. This is really important because I have found that bread making and working with yeast is a little more scientific than I originally thought. A simple kitchen scale makes it easy. I have linked to this scale before from Amazon; right now it’s under $14:


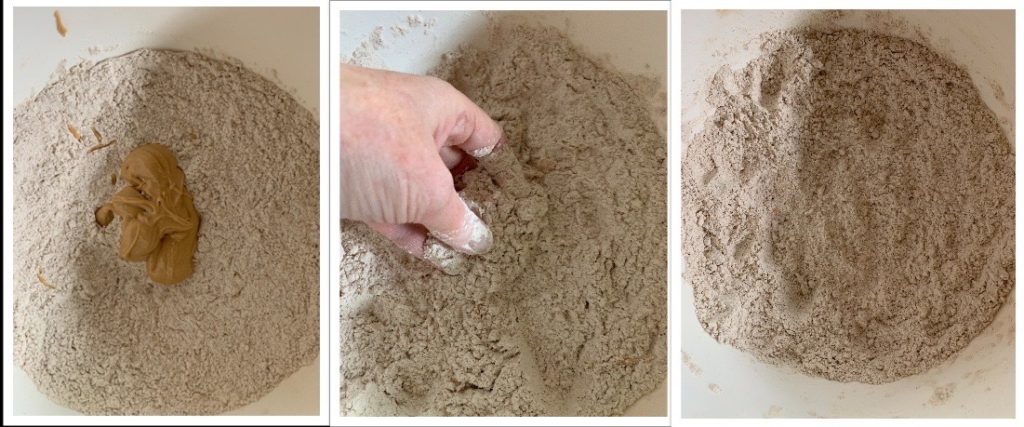
After you mix the dry ingredients, add the cashew butter and mix with your hands for about a minute. Make sure the cashew butter is coated with flour and the pieces are smaller than peas:

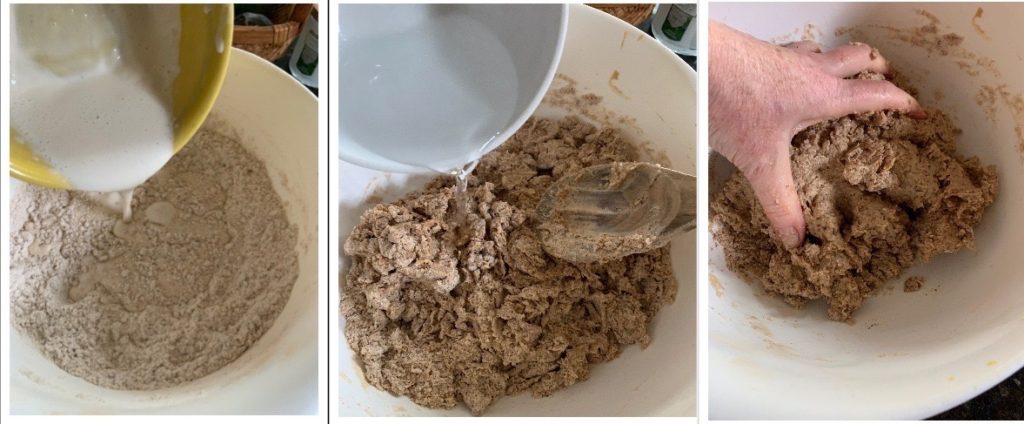
Next, pour the wet ingredients over the flour mixture. Notice, you add only half the water to start. This allows the remaining water to pick up all the flour without letting the dough get too soggy…a Paul Hollywood method.

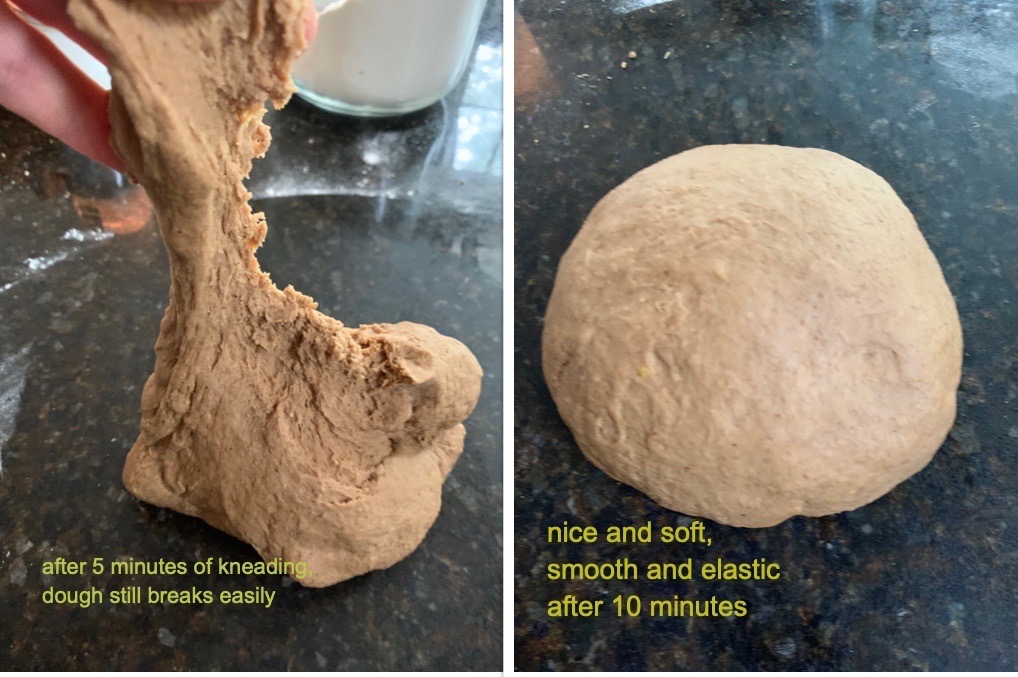
Kneading is next. It’s a great arm workout (at least for me). It will take about ten minutes to get the dough to be smooth and elastic. The first pic on the left shows that after five minutes the dough breaks easily so you really want to knead for at least ten minutes to really develop the gluten as shown in the second picture.

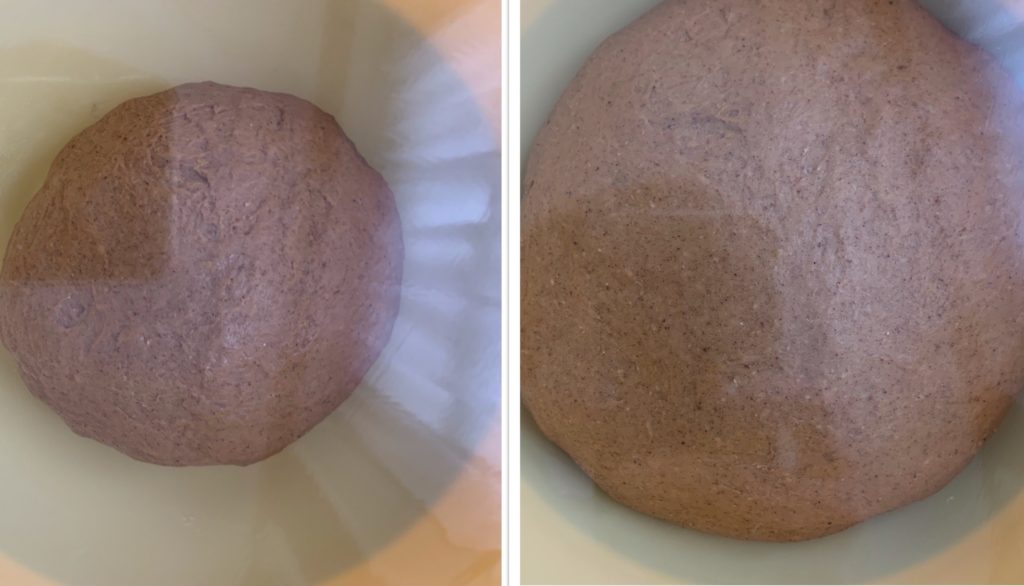
Proof! You’ll prove, or let the dough rise, three different times for these buns. It’s worth it. The flavor and texture develop with each prove and really, proving is just waiting. There’s no labor involved. During the first prove (about 90 minutes) the dough doubles in size:

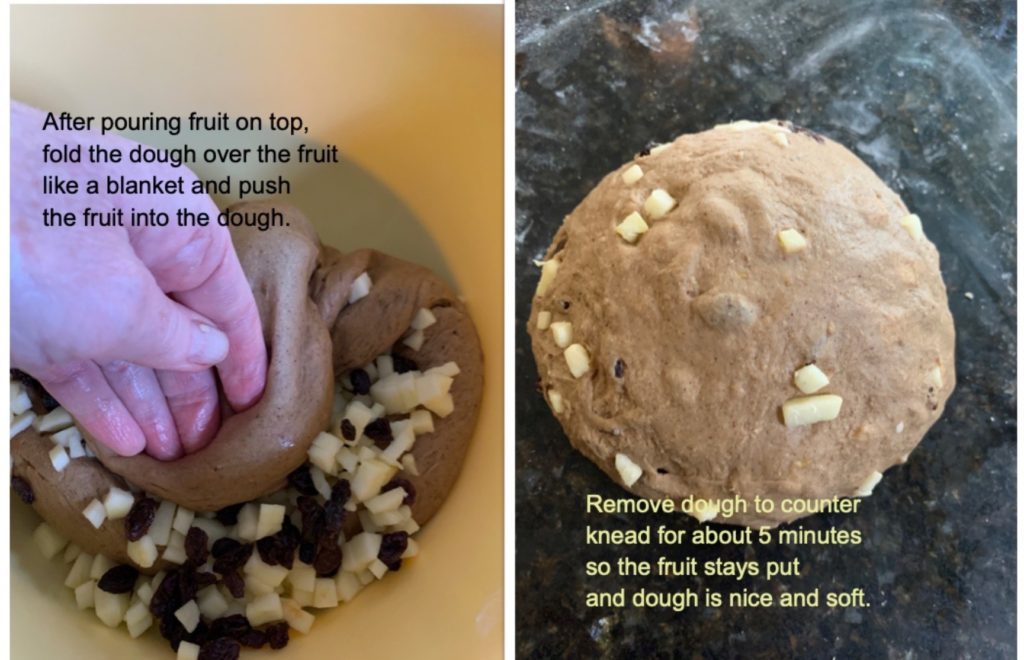
At this point, you are ready to add your fruit. Some recipes call for adding it at the beginning, others at this point. I can’t remember why 😳. Either way, I have made these buns both ways but they are definitely better when I add fruit after the first rise. I also used apples which, because they are wet, need to be kneaded back into the dough as shown (they like to fall of if you don’t):

Now you are ready to prove again, just cover like you did the first time and rest for an hour.

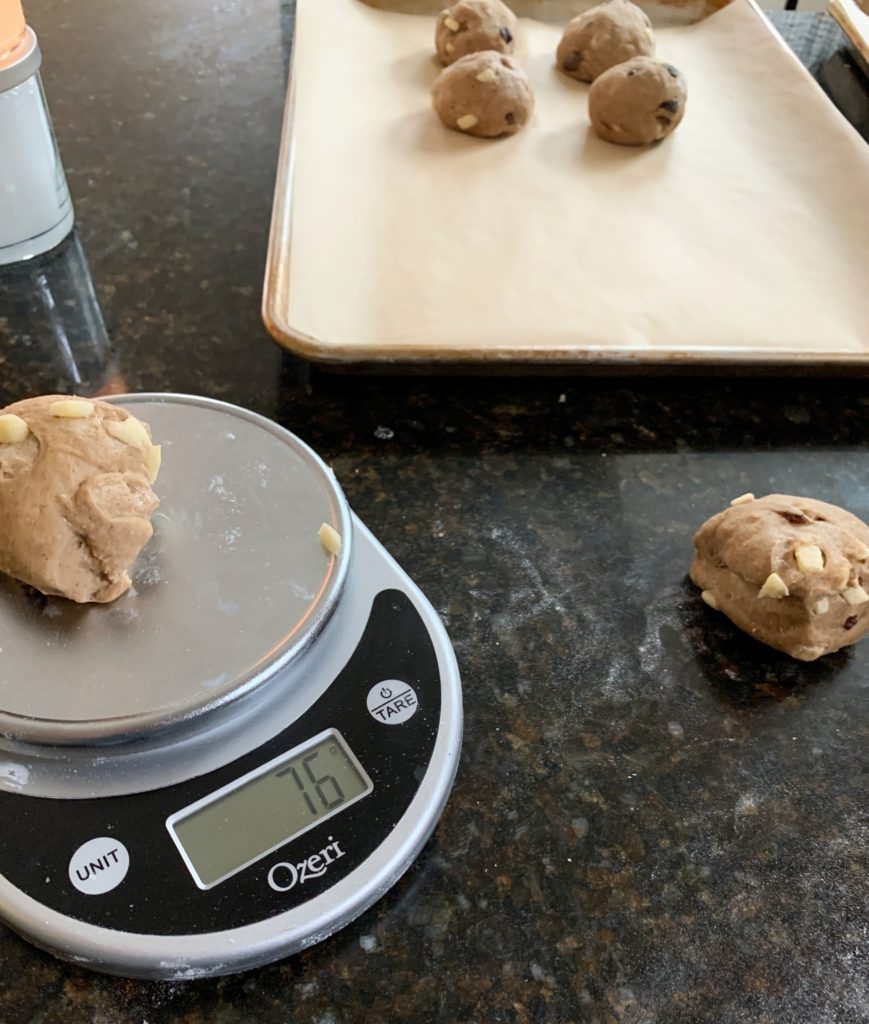
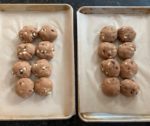
After this second rise, you will divide your dough equally into 16 buns. Here your scale comes in handy. It really takes the guesswork out of bun size! Cut off a piece of dough, roughly the size of a pool ball, and place on the scale. You’re looking for pieces that are about 75g in weight.

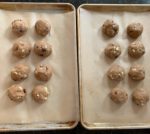
Repeat the process and roll each dough piece with your hands on the counter for about 10 seconds to form a smooth ball. Place the buns close together on the baking trays but not touching. (see photos in the the actual recipe 👇🏼). You’ll prove again for an hour.
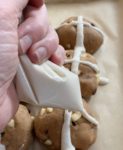
Before baking, prepare the flour paste for the crosses. I didn’t even use a piping bag, just a sandwich bag. I snipped a tiny bit off one corner and piped straight down the row of buns and then across. See the photo in the recipe as well.
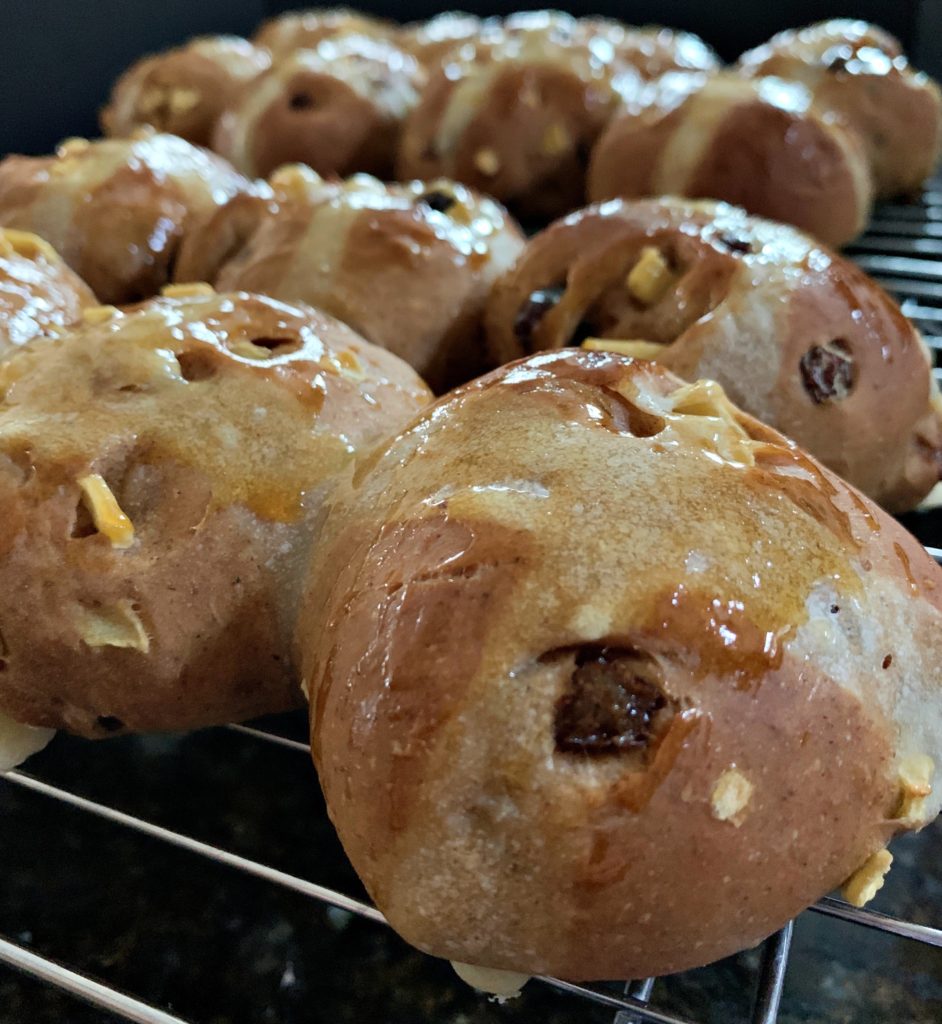
Bake these babies for 20-22 minutes. Because this dough is darker (due to the date sugar) these will get browner than the typical hot cross buns. Don’t be alarmed. While they bake, you can prepare the optional glaze. Two versions are in the recipe: one using date syrup (if you really want to keep the refined sugar out), the other simple syrup. Glaze when they are still hot from the oven 😊.

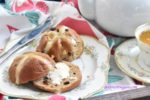
Wait at least 10 minutes (it’s gonna be tough) until cool enough to eat. They are so delicious warm! You can slice and add vegan butter but they are great plain. Once completely cool, store in an airtight container in the refrigerator for a few days. Just warm in your oven and enjoy! If you want, you can even freeze for up to a month.


- 500 g bread flour
- 75 g date sugar
- 1½ tsp cinnamon
- ½ tsp nutmeg
- ¼ tsp allspice
- 10 g instant yeast
- 10 g salt
- zest 1 large lemon
- 6 tbsp cashew butter
- 150 ml cashew cream
- 150 ml water
- 3 tbsp aquafaba liquid from canned chickpeas
- ¾ tsp vanilla extract
- 250 g fruit (peeled and finely diced apple and raisins) about 125 g of each
- 2 tbsp date nectar
- 1 tbsp orange juice
- 2 tbsp simple syrup
- 2 tbsp orange juice
-
Measure flour into a large mixing bowl. Add the next six dry ingredients, making sure to pour the salt away from the yeast.
-
Whisk together dry ingredients, then whisk in zest.
-
Place cashew butter on top of the flour mixture and mix in with your hands. The goal is to rub in the cashew butter and coat it with the flour. Pieces should be smaller than pea sized; this should take about a minute or so.
-
In a separate bowl, whisk together the cashew cream, 75ml of the water, aquafaba and vanilla.
-
Pour the liquid on top of the flour mixture and stir with your hands until the liquid is fully absorbed. Pour in the remaing water a little at a time unil all the flour is pulled in to the dough.
-
Dust your work surface with flour and place your dough on otop.
-
Knead by hand for a good 10 minutes. It's a bit of a workout! The dough should be smooth and not break apart easily when stretching it.
-
Proof #1: Place dough in a large bowl, cover top of bowl with plastic wrap and let it rise at room tempurature until doubled. This should take about 90 minutes.
-
Prepare your fruit and set aside.
-
After dough has doubled, remove palstic and pour fruit in top.
-
Pull the sides of your dough over the fruit, covering like a blanket. With your hands. push the fruit into the dough until it is relatively evenly distributed.
-
Dust your work surface with a little flour and place dough on top.
-
Knead for about 5 minutes until smooth again and fruit stops falling off!
-
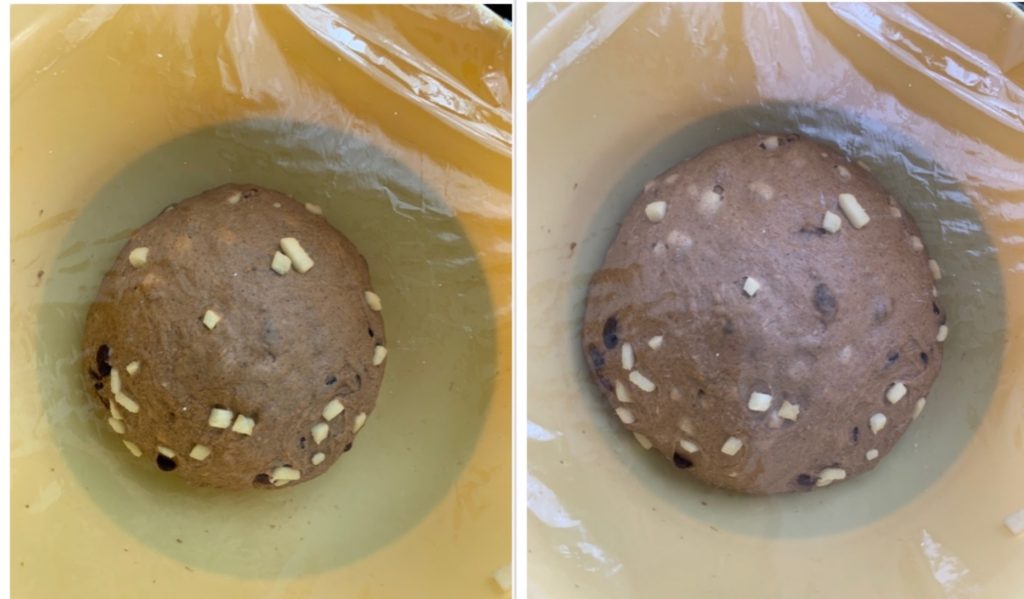
Proof #2: Place dough back in bowl, cover with plastic again and let rise until doubled. This should take about one hour.
-
Prepare two baking sheets by covering with parchement paper.
-
After dough has doubled, remove plastic wrap.
-
Lighlty dust work surface again with flour.
-
Cut off a piece of dough about the size of a pool ball. Weigh it; you want it to be about 75g.
-
Roll lightly with your hand to a smooth ball and place on your baking pan.
-
Repeat with remaing dough. You will get about 16 rolls as shown.
-
Proof #3: Cover lightly with a towel and let rise again for one hour. At this time the rolls should touch as shown.
-
Preheat oven to 375°F.
-
Prepare your flour paste by mixing 75g of flour with 5-6 tablespoons of water. Start with 4 tablespoons and add rest as necessary to create a thick glue consisitency.
-
Spoon paste into a piping bag or sandwich bag and set aside.
-
After final proof, remove towels and pipe crosses as shown.
-
Bake for about 20-22 minutes until deep golden brown.
-
While baking, make the glaze (optional). For the refined sugar-free option, simply mix the wtoe ingredients together in a small bowl or ramekin.
For the other glaze option, mix ingredients together in a small sauce pan over medium heat. While stirring well, reduce mixture by half and place in a small bowl or ramekin.
-
Remove buns from oven. Lift with parchennt paper to a cooling rack.
-
Optional: brush with desired glaze.
-
Cool a bit and eat.


After cooling, serve immediately. They also reheat beautifully.
Place in plastic container and cover. Keep in refrigerator up to a week or freezer for a month (maybe more). Let come to room temp and reheat in a 325F oven or slice and toast.